
AxiTrace for WooCommerce
A start-to-finish walkthrough: install the plugin, paste your workspace public key, configure a first-party tracking subdomain so the SDK loads from your own domain, and verify the first server-side purchase event lands in your AxiTrace dashboard. About ten minutes from blank to fully wired.
Before you start
You will need:
- An AxiTrace account with at least one workspace. Create one for free (10,000 visits/month, no card required).
- A WooCommerce store on WordPress 6.4 or newer, WooCommerce 8.2 or newer, PHP 8.1 or newer.
- Administrator access in WP Admin (to install plugins) and access to your DNS records (only if you want a first-party tracking domain - recommended but optional).
- About 10 minutes. Less if you skip the custom domain step.
The plugin declares full compatibility with WooCommerce HPOS (High-Performance Order Storage) and the Cart & Checkout Blocks. It works with both classic and block-based checkouts out of the box.
Copy your workspace public key
The public key (always starts with pk_live_) identifies your AxiTrace workspace. The WooCommerce plugin uses it to authenticate every event it sends.
- Sign in at axitrace.com/login with your email and password.
- You land on the Workspaces page. Click the workspace name you want to connect to your store.
- The workspace opens on Overview. Click Workspace settings in the sidebar, open Tracking & domains and find the Container Information card.
- Click the small copy icon next to the Public Key field - you should see a “Copied to clipboard!” toast.
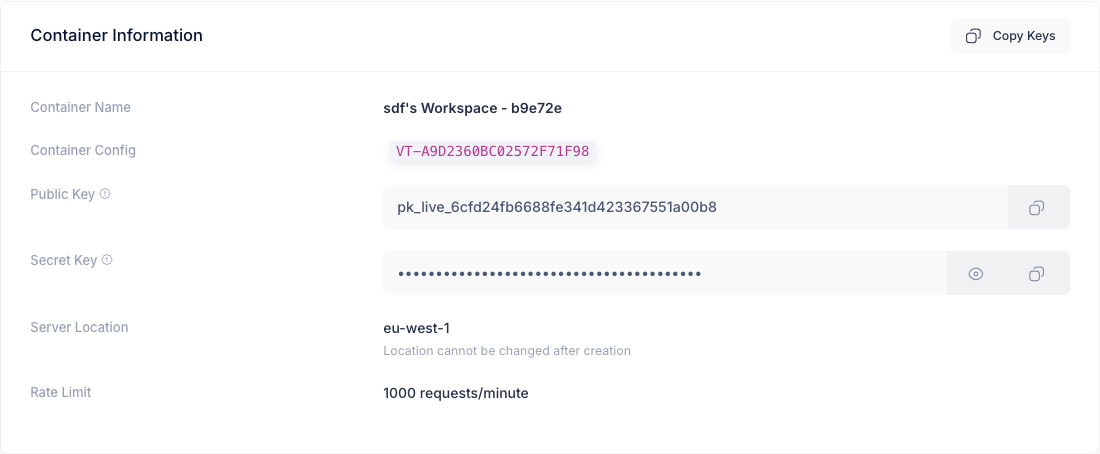
You can also open axitrace.com/admin/workspaces/{uuid}/connections/woocommerce directly - there is a dedicated WooCommerce Integration page that displays just the public key together with the four-step setup checklist.
Install the AxiTrace plugin
Option A - Install from your WordPress admin (recommended)
- In WP Admin go to Plugins → Add New.
- Search for AxiTrace for WooCommerce.
- Click Install Now, then Activate.
The plugin is published in the WordPress.org Plugin Directory at wordpress.org/plugins/axitrace-for-woocommerce. Installing it this way is the shortest route and WordPress keeps the plugin updated for you from then on.
Option B - Upload the ZIP manually
- Download the plugin from axitrace.com/downloads/axitrace-for-woocommerce.zip (or use the big purple button at the top of this page). You can also get it from the Connections → WooCommerce page in your AxiTrace admin.
- In WP Admin go to Plugins → Add New → Upload Plugin, choose
axitrace-for-woocommerce.zip, click Install Now, then Activate.
Use this route if your host blocks installs from the directory, or if you need to pin one specific build. A manually uploaded copy does not update itself, so you have to repeat the upload for every new release.
If activation shows “AxiTrace for WooCommerce requires WooCommerce to be installed and active.” - make sure the WooCommerce plugin is installed and activated before AxiTrace. The plugin only boots after the plugins_loaded hook fires with WooCommerce present.
Connect the plugin to your workspace
Now paste the public key into the plugin settings.
- In WP Admin open WooCommerce → Settings → Integrations → AxiTrace.
- Paste the value you copied earlier into the Public Key field. Expected format:
pk_live_followed by 32 hexadecimal characters. - Leave First-party tracking domain blank for now - we will configure it in the next step (or you can skip that step entirely if you don’t want a custom domain).
- Keep Server-side events ticked. The plugin description reads “Send purchase events server-side via Action Scheduler (recommended).” - this is what bypasses ad blockers and improves match rates on Facebook CAPI, TikTok Events API and Google Ads.
- Click Save changes.
Plugin settings - field reference
| Field | Required | Notes |
|---|---|---|
| Public Key | Required | Starts with pk_live_ (production) or pk_test_ (test workspace). Validation regex: ^pk_(live|test)_[A-Za-z0-9]{20,64}$. |
| First-party tracking domain | Optional | Hostname only, e.g. axi.your-store.com. Leave blank to use the default ingestion host stat.axitrace.com. |
| Server-side events | Default ON | Checkbox. Sends purchase events server-side via Action Scheduler. Disable only for diagnostics. |
Set up a first-party tracking domain (strongly recommended)
By default the AxiTrace JavaScript SDK loads from stat.axitrace.com and events post there too. That works - but it is a third-party domain from your visitors’ perspective, so:
- Ad blockers like uBlock Origin and AdGuard increasingly block
stat.*subdomains by reputation. - iOS Safari (ITP) and Firefox aggressively cap third-party cookie lifetimes.
- First-party DNS lookups happen at your domain registrar, not ours - your visitors see one less external host.
When you point a subdomain like tracking.your-store.com at our infrastructure via CNAME, the SDK and ingestion endpoint load from your domain. Match rates typically jump 5-15 %.
4a. Add the domain in AxiTrace
- Back in your AxiTrace workspace, open Workspace settings → Tracking & domains and scroll to the Domains card.
- Click the Add Domain button (top-right) - or Add Your First Domain if the list is empty.
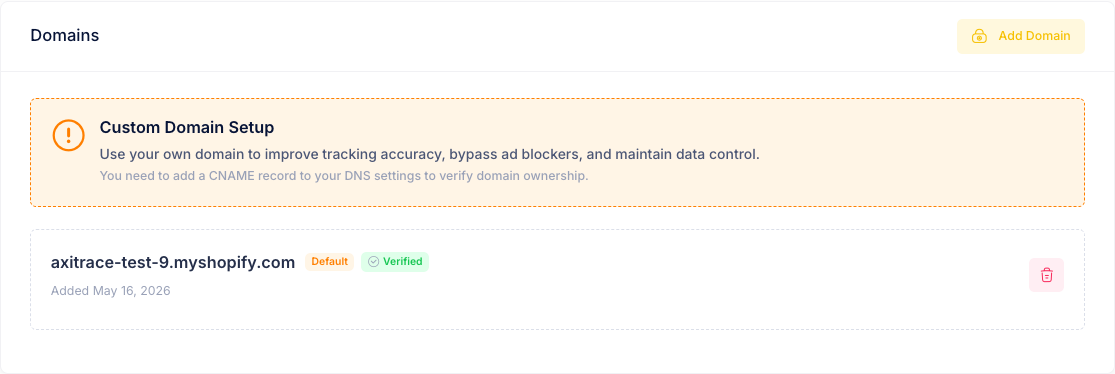
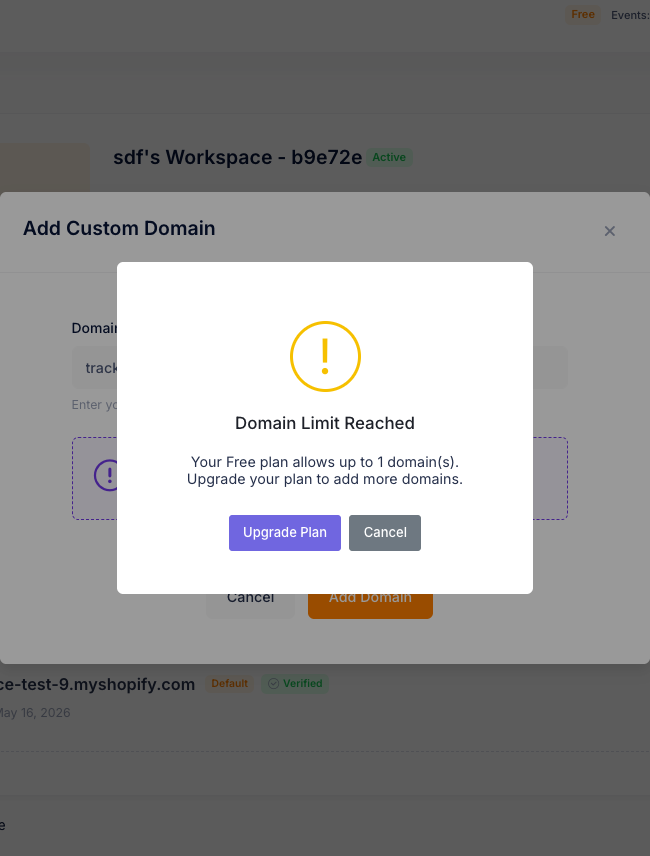
- In the Add Custom Domain modal, enter the subdomain you intend to use - e.g.
axi.your-store.comortracking.your-store.com. Placeholder shown:axi.your-domain.com. - Click Add Domain. AxiTrace creates the entry as pending_verification.
4b. Create the CNAME at your DNS registrar
In your DNS provider (Cloudflare, GoDaddy, Namecheap, AWS Route 53, etc.) add a single CNAME record:
| Type | Host / Name | Value / Target |
|---|---|---|
CNAME |
tracking |
stat.axitrace.com |
The Host column is whatever subdomain you chose (e.g. axi, data, link). The Value is always exactly stat.axitrace.com.
Set the Proxy status to DNS only (grey cloud, not orange). Cloudflare’s proxy will otherwise rewrite the CNAME and break TLS at our end. SSL certificates are issued by AxiTrace automatically once the CNAME resolves.
4c. Verify the domain
DNS propagation is usually a few minutes but, as the AxiTrace UI itself notes, “it can take up to 72 hours”. Once the CNAME resolves:
- Open the Domains tab again.
- Find your pending domain in the list and click Verify Now. The status changes to Verified.
4d. Tell the WooCommerce plugin
Two ways to do this:
In the plugin settings, click Detect from AxiTrace next to the tracking-domain field. The plugin contacts axitrace.com/api/public/workspace/tracking-domain using your public key, finds your verified domain, and fills the field in. A success message “✓ Detected. Remember to save.” appears - click Save changes.
Or manually: paste your subdomain (e.g. tracking.your-store.com) into the First-party tracking domain (optional) field and click Save changes. Do not include https:// or any path - just the host name.
From now on, the SDK is loaded from https://tracking.your-store.com/velitrack-sdk.js and events POST to https://tracking.your-store.com/woocommerce/pixel.
Place a test order
The fastest way to confirm everything is wired up is a real (or staging) order. We recommend the cash-on-delivery / bank transfer payment method so you don’t trigger your live card processor.
- Open your store in a fresh incognito window (so you are an anonymous visitor, not a logged-in admin).
- Browse a few products, click Add to cart, go to checkout, and complete an order.
- On the Thank-you page, the plugin fires both a client-side and a server-side
transaction.chargeevent, each carrying the full order (line items, phone, name, billing address). The two share the same UUID: AxiTrace keeps whichever arrives first and every ad platform deduplicates on it.
The server-side purchase event is queued through WooCommerce’s Action Scheduler rather than fired inline. Most stores process it within seconds; on hosts with infrequent wp-cron ticks it can take up to a minute. The order gets a meta key _axitrace_purchase_event_sent after dispatch so it never double-fires.
Verify in the AxiTrace dashboard
- Go to your workspace at axitrace.com/admin.
- Open Overview - within 60 seconds you should see your visitor count tick up and the test order appear in Visitors with full transaction data (order ID, value, currency, items).
- Back in the WooCommerce plugin settings, the integration description now shows a green status badge like “✓ Connected - last event 1 minute(s) ago.”
Connection status legend
-
✓
Connected - last event within the last 5 minutes. Healthy.
-
!
Connected, no events yet - the key is valid but nothing has been ingested. Place a test order.
-
!
No events in the last 5 minutes - used to be working, has gone quiet. Trigger another order.
-
×
Last event > 24 hours ago - likely the public key was rotated or the workspace was deleted.
What gets tracked
The plugin fires four standard e-commerce events. All of them propagate to every ad platform you have connected (Facebook CAPI, TikTok Events API, Google Ads, GA4).
| Event | When it fires | Client | Server |
|---|---|---|---|
product.view |
Single product page loads | ✓ | - |
product.addToCart |
Server-side on woocommerce_add_to_cart (every add-to-cart path, including Blocks and ad-blocked browsers) |
✓ | ✓ |
begin_checkout |
Checkout page loads | ✓ | - |
transaction.charge |
Thank-you page + on payment_complete / status processing / completed |
✓ | ✓ |
Purchase events use a deterministic UUID v5 derived from the order ID - the client and server event share the same event_id so Facebook CAPI deduplicates them automatically. Cart and product events use a fresh UUID v4 per fire.
Cookie consent
Whether tracking waits for the visitor's cookie banner is decided in AxiTrace, not in WordPress: Workspace settings → Privacy & consent → Respect cookie consent. It is off by default, and the change reaches your store within 5 minutes. Plugin 1.4.0 is what makes that work on a WooCommerce store, with or without a consent framework.
- The SDK script is loaded on every page, in both cases. It is the script that carries the workspace policy, so a store with no consent framework can still be gated by the AxiTrace switch. The SDK itself stays inert - no cookie, no storage entry, no request of any kind - until it is allowed to run.
-
With the WP Consent API installed (Complianz, CookieYes and other consent managers
implement it), the plugin gate applies on top of the workspace policy: the SDK is initialised with
consent required and is released only when the
marketingcategory is allowed. A page can tighten the workspace policy this way, never loosen it. - Without the WP Consent API the plugin passes no gate at all and the workspace setting decides on its own.
-
A withdrawal takes effect immediately. A
wp_listen_for_consent_changeevent that deniesmarketingcallsAxitrace.revoke(), which stops the SDK and deletes the identifiers the grant allowed it to write. - The decision is made in the visitor's own browser, never rendered into the HTML, so a full-page cache (LiteSpeed, WP Rocket) can never serve one visitor's consent to the next.
- The decision recorded in the browser travels with the purchase, so the workspace forwarding policy can act on it as well.
Only marketing consent unlocks AxiTrace: a visitor who allowed statistics only is not tracked. The full picture, including how to wire a banner that does not implement the WP Consent API, is in the Cookie consent guide.
Profit tracking (product costs)
Plugin 1.5.0 and later can send each order line's cost from WooCommerce's Cost of Goods Sold feature, and report refunds and cancellations, so AxiTrace can calculate profit and POAS (Profit on Ad Spend). Paste your secret key into AxiTrace secret key (optional) in the plugin settings to switch it on; without it no costs and no refunds are sent. Setup and details: Profit and POAS - WooCommerce.
Troubleshooting
Plugin shows “Connected, but no events received yet”
Your public key is valid but nothing has been ingested. Place a test order (Step 5). If still nothing:
- Check WooCommerce Status → Scheduled Actions - the queued
axitrace_send_purchaseaction should be marked complete, not failed. - Confirm your hosting provider hasn’t disabled outbound HTTP. The plugin calls
wp_remote_post(). - If you set a custom tracking domain, verify the CNAME has propagated using
dig tracking.your-store.com- the answer should resolve to AxiTrace IPs.
Auto-detect button says “No verified domain found for this workspace”
The auto-detect endpoint only returns domains that are verified in your AxiTrace workspace. Open the Domains tab and:
- Confirm the domain shows a green Verified badge (not pending).
- If still pending, click Verify Now after DNS has propagated.
Save fails with “Invalid public key”
^pk_(live|test)_[A-Za-z0-9]{20,64}$. Most often: a trailing space or newline got pasted along with the key. Re-copy from the AxiTrace admin and try again.
Tracking domain field is rejected
tracking.your-store.com. Invalid: https://tracking.your-store.com/, tracking.your-store.com:443.
Cart events are missing on the Cart & Checkout Blocks
woocommerce_add_to_cart hook, so it fires for the classic AJAX button, the Cart & Checkout Blocks, non-AJAX redirects and even shoppers with an ad blocker. There is no browser-side listener to suppress. If add-to-carts are missing entirely, check that the public key is set and that your host allows outbound HTTP from PHP.
Purchase event fires twice
event_id. AxiTrace stores exactly one purchase per event id (whichever of the two arrives first) and forwards that single event, so Facebook CAPI, TikTok Events API, Google Ads and GA4 each receive one conversion. The browser event only fires for orders WooCommerce already considers paid; the server event covers bank transfers and delayed gateway confirmations when the payment lands.
FAQ
Do I need to install Facebook Pixel / TikTok Pixel / Google Ads tag separately?
Will my checkout get slower?
Is this GDPR-compliant?
marketing category, and a withdrawal calls Axitrace.revoke(), which stops it and deletes the identifiers it wrote. The decision is read in the visitor’s own browser, so full-page caches (LiteSpeed, WP Rocket) can never serve one visitor’s consent to the next, and it travels with the purchase so the workspace forwarding policy can act on it. Both switches are off by default. The plugin also registers GDPR-compliant data exporter and eraser hooks so user data can be exported or deleted on request. See Cookie consent.
What if I uninstall the plugin?
_axitrace_purchase_event_id and _axitrace_purchase_event_sent. Nothing is left behind.
Can I use a test workspace before going live?
pk_test_-prefixed public key, and paste it into a staging store. Events from test workspaces are kept separate and are not forwarded to your ad platforms.
Does this work alongside my existing Pixel/CAPI plugin?
event_id values. We recommend deactivating other CAPI / pixel plugins after you confirm AxiTrace is healthy.
Need Help?
If you have any questions or need assistance:
- Email us at info@axitrace.com - we typically reply within one business day.
- Review the JavaScript SDK documentation if you also embed the SDK directly on non-WooCommerce pages.
- Or open the Pixel Deduplication guide if you suspect double-counting issues in Facebook Ads Manager.